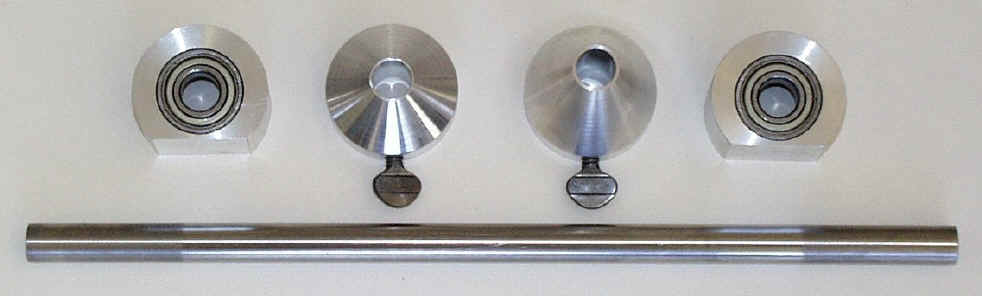
For a printer friendly PDF version please click here. The balancer assembly includes the following parts: · Two bearing blocks · One ½” tool steel axle. · One ¼"-20 spade head wing screw per cone or adaptor where required. · Various cone and adapter configurations depending on the application. The user supplies two supports of the same height to support the balancer and wheel. A pair of milk crates or cinder blocks work well. They must be taller than the radius of the tallest wheel you are going to work on. In our shop we use a pair of jack stands available at most auto parts chains for less than $15. Universal UNIV and FZB come with two 1.45" diameter cones. They can be used on either side of the wheel. Aprilia Single-Sided APF comes with two compound taper cones. You can use them on either side of the front and rear wheels. BMW 1974 and Older with a 14mm axle on either wheel come with two 1.45" diameter cones. They can be used on either side of the wheel. BMW 1984 and Older with Tapered Roller Bearings BA17 or BA20 comes with two adapters. For the rear wheel the long adapter is used on the drive side of the wheel and the short adapter on the other side. The front wheel doesn't matter. BMW R80GS and R80ST BMLE comes with two adapters for the front wheel and two cones for the rear wheel. The adapters are of different length and can be used on either side of the front wheel. The shorter cone is used on the drive side of the rear wheel and the longer cone on the other side. You may notice that the shorter cone is just slightly larger than the drive side opening. That is by design. BMW Paralever BML comes with two cones of different lengths. The shorter cone is used on the drive side of the rear wheel and the longer cone on the other side. You may notice that the shorter cone is just slightly larger than the drive side opening. That is by design. The factory BMW rear wheel adapter is NOT NEEDED. The front wheel uses the shorter cone on the speedometer drive side (when equipped) and the longer cone on the other side. BMW F650CS comes with four cones, two Universals and two special cones for the rear wheel. The larger cones are for the rear wheel and the smaller cones are for the front wheel. One of the large cones has a wing screw in it and is used on either side of the rear wheel. The large cone without a wing screw is used in conjunction with one of the small cones on the other side of the rear wheel. Assemble the large cone against the wheel hub and use the small cone to press against the large cone to hold it in place. BMW F800S/ST F8S is the same as the BG12 below. It currently is coming with (2) pairs of plastic spacers because I'm not sure which set is the best length. If you could let me know I would appreciate it. BMW K1600GT/L is the same as the BG12 below. The only difference is that it comes with one set of plastic spacers. BMW R12GS/RT/S/ST/R, K12/13R/S/GT BG12 comes with two cones and one rear wheel adapter with either 2 or 3 pairs of plastic spacers and 2 thumb screws. The two cones are used on the front wheel. The adapter attaches to the rear wheel by sliding it in from the drive side. The thumb screws and spacers hold the adapter in place without marring the paintwork. Please refer to the pictures below. Update: I have heard of four early production (Jan and Jun '04, Feb '05) GS spoke wheels that had their center hole very slightly undersized. Both owners were able to get the adapter to fit after sanding the inner surface of the wheel center hole slightly. I have no explanation for this anomaly. BMW R12GS/RT/S/ST/R, K12/13R/S/GT BG13 comes with one cone and one adapter with either 2 or 3 pairs of plastic spacers and 2 thumb screws. The cone is used on the left side of the front wheel. The adapter is used as a cone on the right side of the front wheel. The adapter attaches to the rear wheel by sliding it in from the drive side. The thumb screws and spacers hold the adapter in place without marring the paintwork. Please refer to the pictures below. Be sure to remove the wing screw that holds the adapter on the shaft when mounting the rear wheel. It is not necessary and will affect your balance. Update: I have heard of four early production (Jan and Jun '04, Feb '05) GS spoke wheels that had their center hole very slightly undersized. The owners were able to get the adapter to fit by sanding the inner surface of the wheel center hole slightly. I have no explanation for this anomaly. 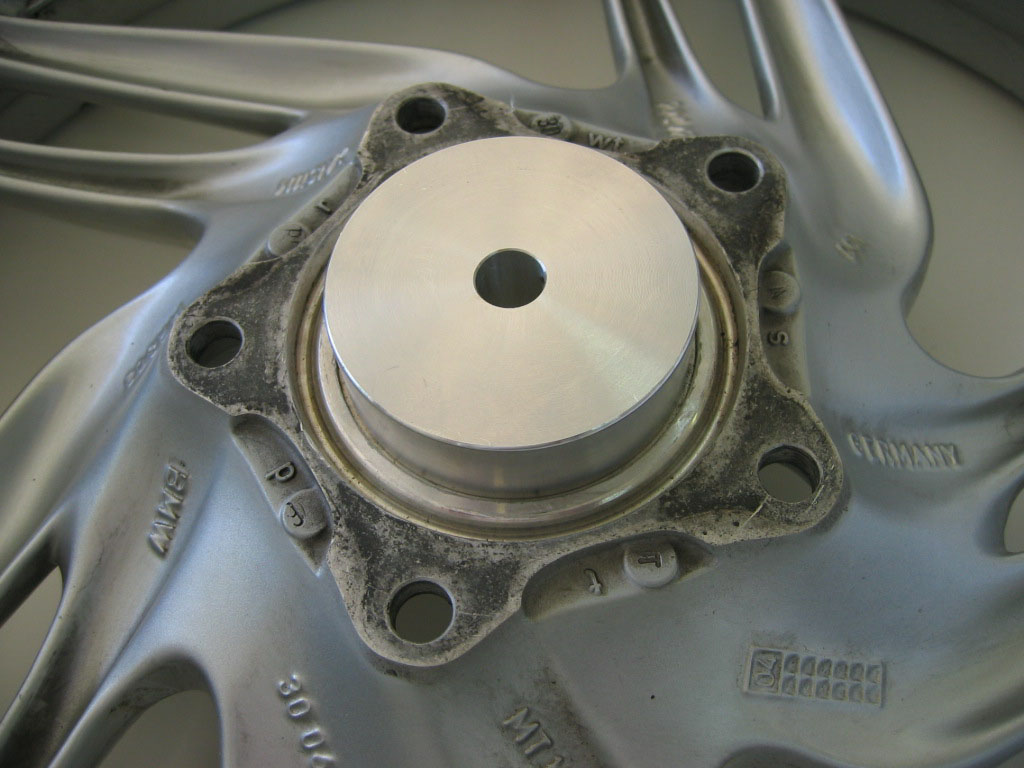 | Slide the adapter in from the drive side of the rear wheel. | 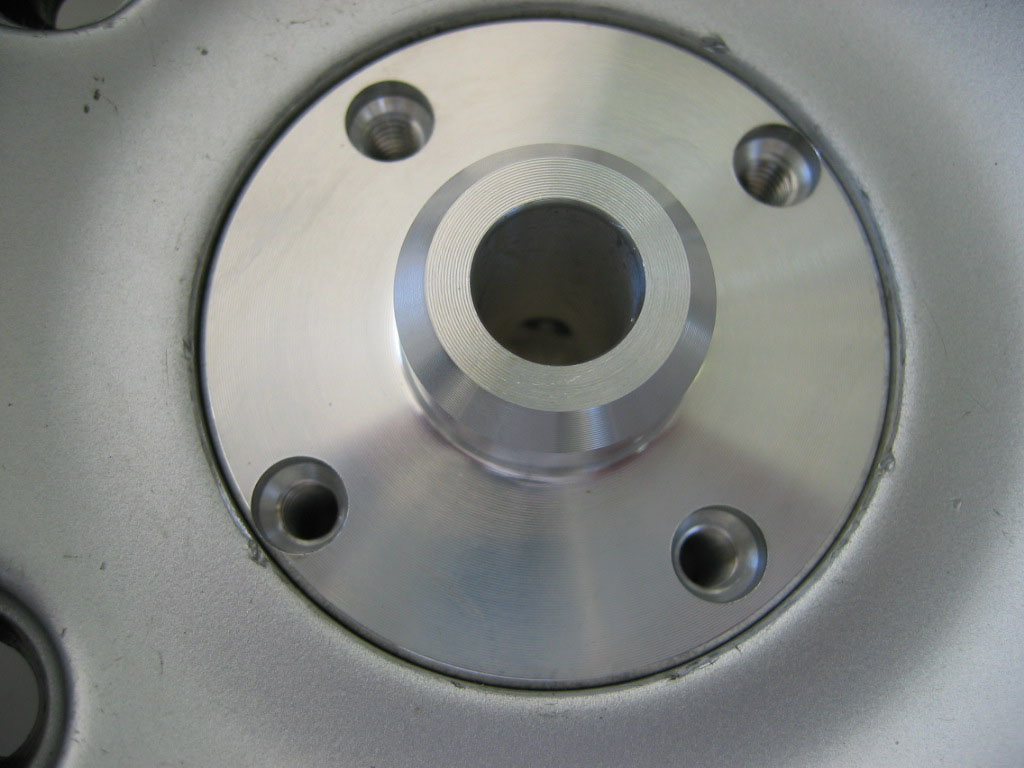 | Looking at the non-drive side of the rear wheel with the adapter in place. Notice that there are two pairs of holes. Please use the pair that is closest to the edge of the wheel opening. In this case we will use the pair at the 2 and 8 o'clock positions. | 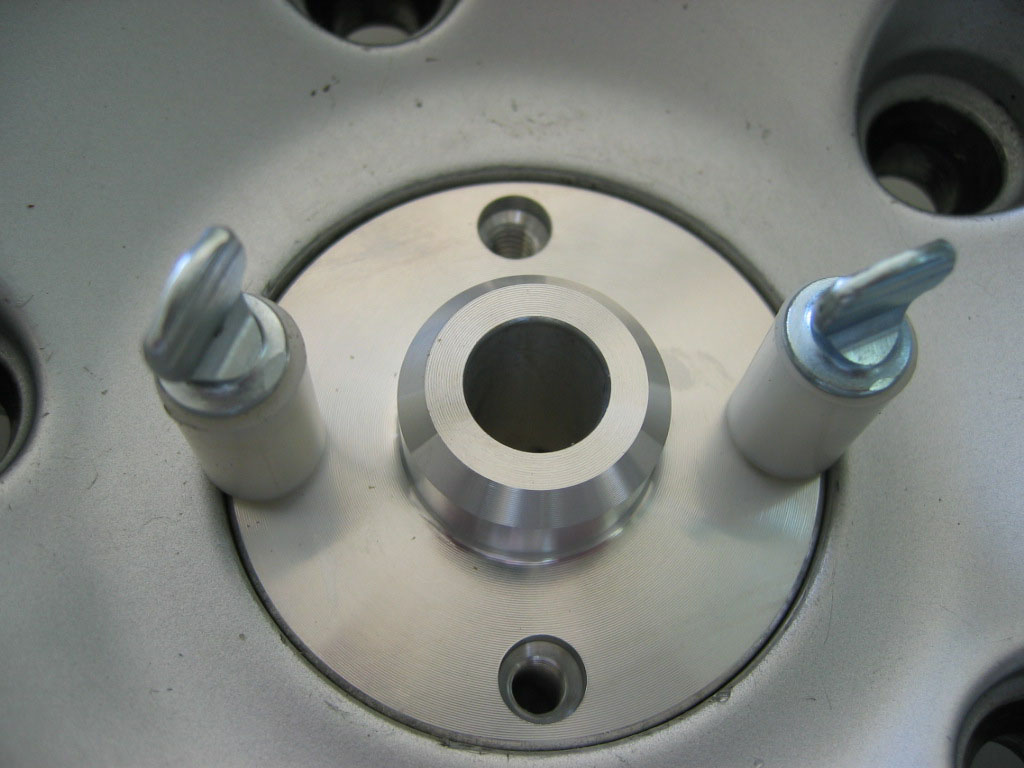 | Slide the spacers onto the thumb screws and thread them into the adapter. They will hold the adapter securely in position. BMW wheel hubs have various thicknesses. Please choose the appropriate pair of spacers that will keep the thumb screws from bottoming in the adapter. Be sure to snug up the thumb screws evenly so as not to cock the adapter in the hole. You can now slide the axle through the adapter and suspend the assembly with the bearing blocks as normal. |
Boss Hoss BHC comes with four cones. The long cones are for the rear wheel. The short cones are for the front wheel. Ducati Single-Sided DU42 comes with two 2" diameter cones. They can be used on either side. Ducati Single-Sided DU55 comes with one 2.3" and one 2" diameter cone. The 2.3" cone is used on the drive side of the rear wheel. When mounting the front use the 2" cone on the speedometer side of the wheel. Harley HD1 comes with two cones. Use the longer one on the belt drive side of the rear wheel. Cones can be used on either side of the front wheel. Honda HOV comes with one universal cone and one compound taper cone. The compound taper cone is used on the drive side of the rear wheel and either side of the front wheel. The universal cone is used on the other side. Honda Silverwing comes with two cones with different length snouts. On the front wheel use the longer snout cone on the left side. On the rear wheel use the longer snout cone on the left side as well. Honda HOVS comes with two compound taper cones. Leave the original Honda center lock spacer installed in the non-drive side of the rear wheel. The cones can be used on either side of the front and rear wheels. Honda ST1300/VTX ST3 and ST3L comes with two cones. The one with the smaller tapered end is used on the non-drive side of the rear wheel and on either side of the front wheel. KTM KTMA comes with two compound taper cones. If your rear wheel has spacers that fit inside the wheel bearings then leave them installed. The taper at the end of the cone is designed to fit inside them. The front wheel bearings have an inside diameter of 30mm which will fit the second taper. The cones can be used on either side of the wheel. Long Axle FZB comes with two 1.45" diameter cones and a 14" axle. The cones can be used on either side. Motor Scooter MS12 comes with two 1.45" diameter cones and a 12 mm axle. The cones are used on either side of the rear wheel. The front wheel is supported by sliding the 12 mm axle through the hub. No cones are needed. MV Augusta MVA comes with two 2.5" cones. The cones can be used on either side. Piaggio X9 comes with two compound taper cones. One has a shorter snout on it than the other. On the front wheel use the cone with the longer snout on the speedometer drive side and the other cone on the bushing side. On the rear wheel use the cone with the shorter snout on the drive side and the other cone on the non-drive side. Piaggio MP3A comes with three cones, two identical large ones and one small one. The rear wheel uses the two large cones. The front wheel uses the large cone on the inner side and the small cone on the outside. Scooter VSP12A comes with two cones, one large one and one smaller one. The large one is used on the side of the wheel with the largest hole and the smaller one on the other side. Triumph Single-Sided TRI comes with two cones. You can use them on either side of the front or rear wheel.Triumph Single-Sided TRIA comes with two cones. The shorter one is used on the drive side of the rear wheel and the longer one is used on the non-drive side. When preparing to set up the rear wheel slide the longer cone on the shaft and tighten down the wing screw before you slide it through the wheel. The wing screw cones close to the wheel hub which makes it harder to turn once the cone is in position against the wheel. Once the long cone is in place then you can slide it through the wheel and position the shorter cone. Use either cone on either side of the front wheel. Triumph Explorer TEX comes with two cones and one rear wheel adapter with a pair of plastic spacers and two thumb screws. The two cones are used on the front wheel. The adapter attaches to the rear wheel by sliding it in from the drive side. The thumb screws and spacers hold the adapter in place without marring the paintwork. Please refer to the pictures below.  | Slide the adapter in from the drive side of the rear wheel. | 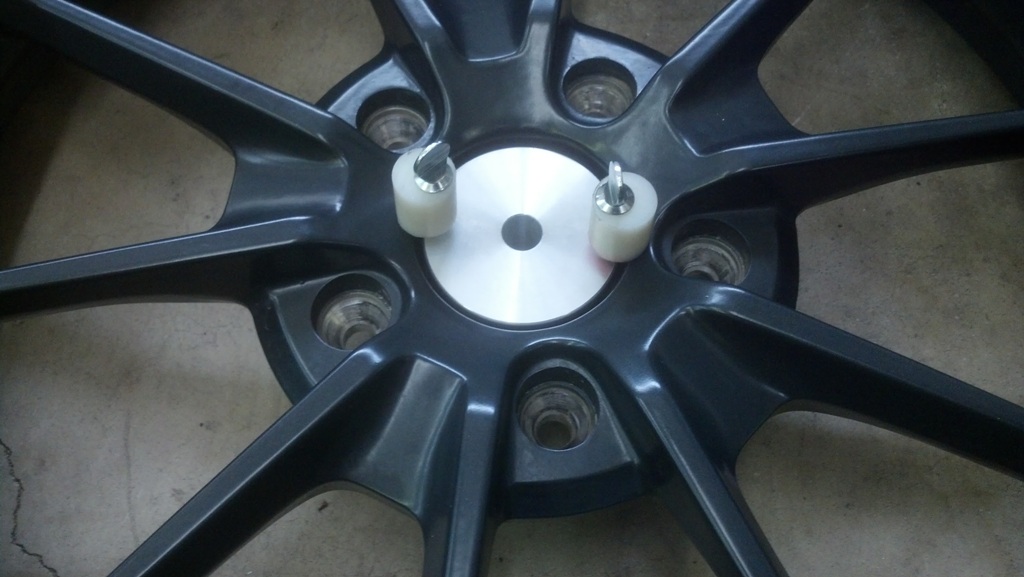 | Slip the thumb screws through the spacers threading them into the adapter. Turn the spacers so the wide portion is toward the wheel. They will hold the adapter securely in position. Be sure to snug up the thumb screws evenly so as not to cock the adapter in the hole. You can now slide the axle through the adapter and suspend the assembly with the bearing blocks as normal. |
Vespa ET2/4 VET10 comes with two different cones. The compound taper cone is used on the mounting flange side of both front and rear wheels. Victory VIC comes with two cones. The long one is used on the pulley side of the rear wheel and the short one on the other side. They can be used on either side of the front wheel. Vinyl End Caps
The balancer comes equipped with black vinyl end caps installed. They are there in order to keep the bearing blocks from inadvertently falling off while carrying the balancer and to keep the assembly together while in storage. My thanks to Rick of webBikeWorldSM for the idea. They are easily removed by pushing the bearing block off the shaft. Setup Procedure If your bike is equipped with a rubber cushioned sprocket/pulley carrier it must be removed. The cones must press directly against the wheel bearings. If you balance the wheel by supporting it via the sprocket/pulley carrier you will not get an accurate balance and probably won't have enough room with the supplied shaft. The carrier is not fixed to the wheel which means the wheel will not be true when supported by the balancer. Trust me on this one :-) The same goes for spacers that do not slide tightly into the wheel bearings. If you support the wheel by a spacer which does not go inside the bearing you'll actually be supporting it by the axle seal which is rubber! No good! Slide one of the cones taper first onto the axle. Slide the assembly through the center of the wheel hub. Slide the remaining cone taper first onto the axle from the other side. Situate the axle so it is roughly centered using the tire as the reference point. Secure one of the cones to the axle by tightening the wing screw. Push the remaining cone against the wheel hub. Orientate the wing screws 180° from each other so they don't affect the balance. Both cones need to be snug against their respective hubs. An easy way to do this is to flip the wheel on its side so it is resting on the balancer axle with the tightened cone. Now simply push the top cone down and tighten the wing screw. Slide a bearing block on each end of the axle. Slide it on only far enough so that the axle is fully through the bearing block. Now take the assembled wheel and balancer and position it between your two supports so that the bearing blocks are holding up the assembly and the wheel is free to spin. You’ll notice the result is an almost friction-free mounting which will allow for a very accurate balance.
A note about the wing screws
As you use the wing screws the end that contacts the shaft will most likely mushroom slightly depending on how hard you tighten them. This is because the screw is softer than the shaft so as not to mar it and because the screw threads run all the way to the end. When you loosen the screw you only need to turn it very slightly so in use the mushroomed portion of the screw never comes in contact with the threads in the cone. The only time you might notice that the screw end is mushroomed would be if you removed the screw completely. In this case you may find the screw snug or turns uneven. This is normal and does not present any problem. Maintenance
Since the shaft is steel it will rust in damp environs. Spraying it occasionally with WD40 will keep it looking new for years to come. Any nicks that develop in the axle can be smoothed using fine emery paper. Please be careful when handling and storing the cones and in particular those that have a small nose. If you drop them the taper might get damaged and if they land on their nose and it gets distorted you will not be able to slide the shaft through the bore since there is only .003" clearance. Guess how I know! If this happens please return the cone and I will repair it for you if possible. Please don't try to repair the bore yourself. The bearings are sealed for life so there is no maintenance required. Using The Balancer
You will need some weights, masking tape, a piece of chalk, some alcohol or contact cleaner and the balancer. It is probably helpful to mention that most tire makers mark the lightest spot on their tires with a paint mark on the sidewall. Metzler as an example, uses 2 little red dots. When you install your tire try to get the paint mark as near as you can to the heaviest spot on the wheel. It will save weight later. If you haven’t previously marked the heavy spot on your wheel you will want to do that before mounting the tire. To find the heavy spot remove any old weights, clean the wheel and install the tire valve and cap. Mount the bare wheel on the balancer and allow it to settle. The spot that settles at the bottom is the heavy spot. Mark it in such a way that you'll be able to find it each time you mount a new tire. I use a permanent marker on the inside of the rim.
It usually takes about 5-10 minutes per wheel balance including mounting the wheel on the balancer. If you haven't done it before it will probably take a bit longer. - Remove any old weights from the wheel and clean it thoroughly. Make sure the valve stem and cap are installed.
- Mount the wheel on the balancer and place it between your equally tall supports so the wheel can move freely.
- It is not necessary to spin the wheel. The wheel will start moving on it's own and stop with it's lightest point at the top. You might want to move it to another position and let go again just to verify that it stops in the same place.
- Once you've verified the lightest spot mark it with chalk on the tire.
- Take a couple of weights and tape them to the inside of the rim at the chalk-marked spot.
- Now take the weighted area and put it at the 3 or 9 o'clock position. If the weight is too heavy the wheel will start turning and end up with the weighted spot at the bottom. Conversely if the weight is too light the weighted area will end up at the top.
- Adjust the weight by adding or removing weights until the wheel can be placed in the 2, 4, 8, 10 o'clock positions without moving. Sometimes you will get a very slight movement. Since the balancer has so little friction you can make yourself crazy trying to get it perfect. Based on your level of anality, don't knock yourself out J
- The next step is to attach the weights to the wheel while still mounted on the balancer. Try to position the weights as close to the center of the rim as possible. If there is a ridge in the middle then try and divide the weights equally across the face of the rim. Clean the area where you are going to put the weights with alcohol or contact cleaner to insure that its free of oil residue. Peel the backing from the weights and stick them on.
- Re-check the balance and once you're satisfied give yourself a pat on the back. You just saved a trip to the dealer and some money. Besides that you know the job was done right.
Your satisfaction is absolutely essential. If you have any concerns please let me know so they can be resolved. If you have any questions or comments please email marcparnesproducts@gmail.com or I can be reached in the shop at 714-842-9210. Thank you!
Marc | 
